Install a Metal Roof

How to Install a Metal Roof in 7 Easy Steps

Wondering how to install a metal roof without the hassle? Many homeowners feel overwhelmed by the process, especially when considering installing metal roofing over shingles or dealing with complex flashing. However, with the right approach, you can install metal roofing panels efficiently and affordably. 

In this guide, we’ll walk you through 7 easy steps, from preparing the roof deck to securing metal roofing screws, ensuring a long-lasting, energy-efficient solution. Whether you’re a DIY enthusiast or simply trying to understand the process, this guide breaks down each step to make installing metal roofing straightforward and stress-free. Let’s get started!

Ready to secure your home with a trusted roofer?

Call Steel Rudder Roofing now for an immediate consultation!

Key Takeaways

    • Durability and Efficiency: Metal roofing offers a long-lasting solution, with the ability to withstand extreme weather while reducing energy costs.
    • Step-by-Step Process: Follow 7 easy steps from planning and removing old roofing to installing metal panels, flashing, and ridge caps.
    • Materials and Tools: Ensure you have the right materials, including metal panels, underlayment, and flashing, along with essential tools like tin snips and roofing screws.
    • Installing Over Shingles: You can install metal roofing over shingles, but make sure to inspect and repair the roof deck beforehand.
    • Regular Maintenance: Post-installation maintenance is key to extending the life of your metal roof—check for loose screws and clean gutters regularly.

Materials and Tools Needed for Installing a Metal Roof

Materials:

Tools:

  • Metal Roofing Panels (corrugated, standing seam, or shingles)
  • Underlayment (synthetic or felt)
  • Metal Roofing Screws (with neoprene washers)
  • Flashing (eave, valley, step, and ridge caps)
  • Closure Strips (inside and outside foam closure strips)
  • Butyl Tape (for sealing seams)
  • Roofing Vent Boots (for sealing around roof penetrations)
  • Tin Snips or Metal Shears (for cutting metal panels)
  • Power Drill (for securing metal roofing screws)
  • Tape Measure (for precise measurements)
  • Chalk Line (for aligning panels)
  • Ladder and Roof Jacks (for stability and access)
  • Safety Harness and Gloves (for fall protection and safety)
How to Install a Metal Roof in 7 Steps: A Simple Guide for Homeowners

7 Step Guide to Installing a Metal Roof

1. Prepare and Plan

Before starting your metal roof installation, it’s important to assess the roof’s structure. If you’re considering how to install metal roofing over shingles, ensure the shingles are in good condition and that the decking underneath is sturdy. This step is crucial to ensure your new metal roof will be properly supported. For new structures, such as sheds or commercial buildings, conduct the same inspection to confirm the foundation is strong and stable.

  • Choose the Right Materials: Depending on the project, you may need corrugated metal roofing, standing seam metal roofing, or 5V crimp metal roofing. Be sure to select high-quality underlayment, flashing, and metal roofing screws for a lasting installation.
  • Gather Tools and Safety Gear: Assemble essential tools like tin snips, a power drill, a tape measure, and chalk line. Don’t forget safety gear such as a harness, gloves, and a sturdy ladder to ensure safe working conditions.
  • Check Local Building Codes: Review your local building codes to ensure that your project, whether it’s installing metal roofing on a house or a shed, complies with regulations. Obtain any necessary permits before beginning your installation.

2. Remove the Old Roofing

If you’re planning to install metal roofing over asphalt shingles, confirm that local building codes allow this. The shingles must be in good condition to serve as a stable base. However, for projects like installing metal roofing on a shed or mobile home, you may need to remove the existing roofing completely to prepare for the new installation.

  • Tear Off Old Shingles: Use a roofing shovel to remove old shingles and underlayment. Ensure the surface is clear of all debris.
  • Inspect and Repair Roof Decking: If you’re working on installing metal roofing over plywood, check for any damage, rot, or weak areas. Replace damaged sections to create a strong foundation for the metal panels.
  • Check for Structural Integrity: Before proceeding, examine the roof’s structural support, including rafters and trusses. Ensure they are free from damage and capable of supporting the added weight of the metal roofing.
  • Clean the Roof Surface: Sweep the roof to remove nails, dust, and debris. This ensures a smooth surface, ready for the underlayment and metal roofing.

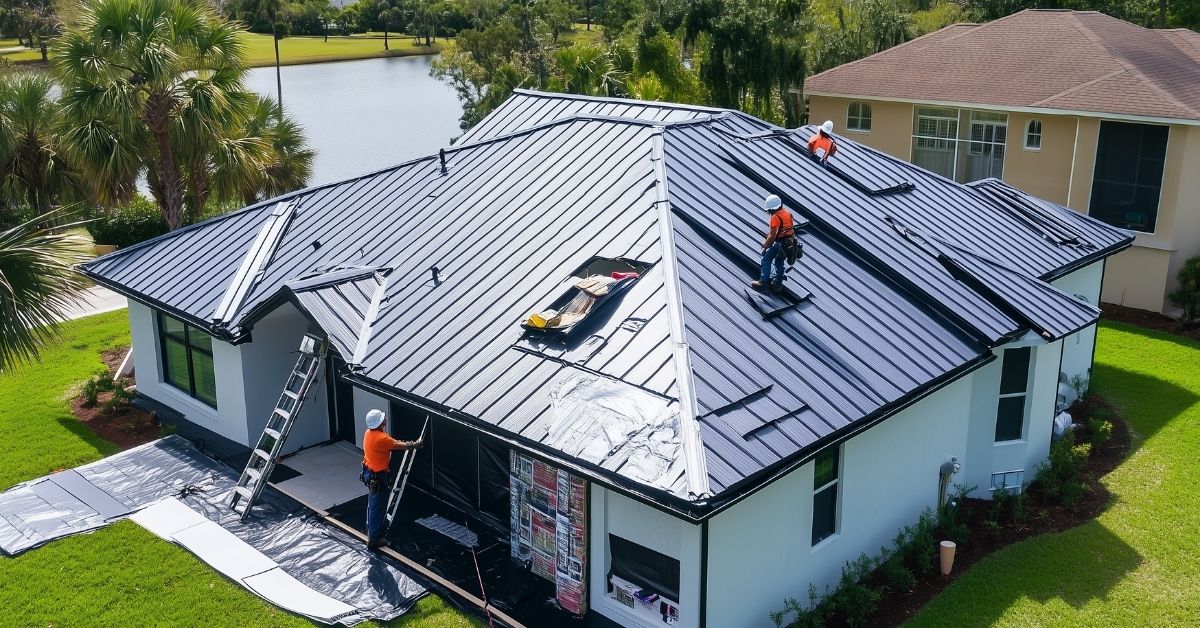
3. Install the Underlayment

Whether you’re installing corrugated metal roofing on a flat roof or a traditional pitched roof, the underlayment is vital for protecting your home from moisture and ensuring a long-lasting roof.

  • Choose High-Quality Underlayment: For added durability and moisture resistance, use synthetic underlayment, especially if you’re also learning how to install insulation under metal roofing. This ensures the roof will stay protected for years.
  • Lay It Down and Secure Properly: Start at the eaves and roll the underlayment horizontally across the roof. Overlap each row by 4-6 inches and secure it with roofing nails or staples, making sure it lays flat and wrinkle-free.
  • Seal Edges and Seams: Apply roofing tape along all seams and edges to prevent moisture infiltration. Proper sealing is key for long-term protection and leak prevention.

4. Install Flashing

Flashing plays a critical role in preventing leaks in areas where water might penetrate the roof, such as valleys, chimneys, and roof edges. Whether you’re installing flashing on a flat or pitched roof, proper installation is essential.

  • Install Eave Flashing: Attach eave flashing along the roof’s edge, overlapping the underlayment. For installing metal roofing on a flat roof, ensure the flashing helps direct water off the roof efficiently.
  • Install Valley and Step Flashing: In areas where the roof meets a wall, chimney, or where valleys are present, install step flashing. For those learning how to install metal roofing in a valley, make sure to center and secure the flashing with nails, allowing water to flow off the roof without leaking into the structure.
  • Seal Around Roof Penetrations: Use appropriate flashing for any vents, chimneys, or skylights, ensuring each area is waterproof and sealed properly.

5. Install Metal Panels

The heart of the installation process involves positioning and securing the metal roofing panels. Proper alignment and fastening are critical for a durable, visually appealing roof.

  • Measure, Cut, and Position Panels: Measure each roof section and cut the metal panels to fit. For projects involving how to install standing seam metal roofing, ensure the panels are aligned perfectly to avoid any gaps.
  • Secure the Panels with Screws: Use metal roofing screws along the ribs of each panel, spacing them 12-18 inches apart. For projects like how to install screw-down metal roofing, make sure the screws are tight enough to seal the rubber washers but not so tight as to distort the panels.
  • Overlap Panels and Trim for Vents or Chimneys: Overlap each panel by at least one ridge for a tight seal. If installing corrugated metal roofing on a shed, trim panels around roof penetrations like chimneys or vents, and apply flashing to ensure these areas are properly sealed.

6. Install Ridge Caps and Trim

Once the panels are secured, finish the roof with ridge caps and edge trim to protect the roof and give it a polished look. Ridge caps seal the peak of the roof, preventing water from entering, while edge trim protects the gable ends.

  • Install Ridge Caps: Whether you’re installing a ridge cap on metal roofing or a 5V metal roof, place the ridge cap over the peak of the roof, ensuring it overlaps the top edges of the panels. Secure it with screws to protect the roof’s seams.
  • Secure Edge Trim: Attach edge trim along the gable ends for extra protection and to give the roof a clean, finished appearance. For projects like installing metal roofing on a lean-to or patio, edge trim also provides water protection at the roof’s edges.

7. Final Inspection and Cleanup

After installation, it’s important to inspect the roof thoroughly to ensure everything is secure and watertight. Cleaning up the site and performing regular maintenance ensures the longevity of your new roof.

  • Inspect for Loose Screws and Gaps: Carefully inspect the entire roof for any loose screws, gaps in the flashing, or misaligned panels. Tighten screws and adjust any panels to ensure the roof is sealed properly.
  • Clean Up Debris and Tools: Make sure to remove all leftover roofing materials, debris, and tools. For larger projects like commercial metal roofing or installing metal roofing on a shed, proper cleanup is essential for both safety and appearance.
  • Perform Regular Maintenance Checks: To ensure long-term performance, schedule regular maintenance checks. Clear debris from the roof, gutters, and downspouts, and inspect the roof for any signs of wear or damage.
Standing seam metal roof
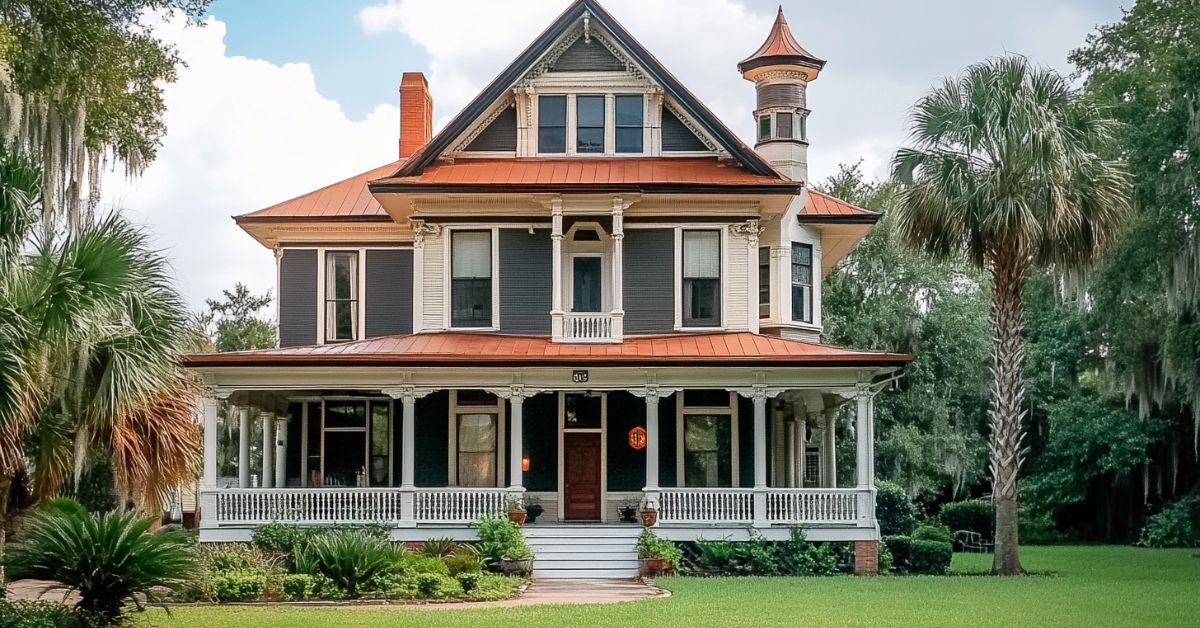
copper roofing

By following this detailed 7-step guide, you can confidently complete your metal roofing installation. From choosing the right materials to securing the final ridge caps, each step ensures a durable, weather-resistant roof.

Hire Steel Rudder Roofing for a Perfect & Cost-Effective Metal Roof Installation

Watch for signs of roof failure inside your home, such as water stains on ceilings, mold growth, or daylight peeking through the attic boards. These issues often indicate compromised roofing integrity, necessitating prompt attention to avoid further damage.

Water stains on ceilings or walls can be symptomatic of roof leaks. Quick roof leak repair in Jacksonville is essential to prevent structural damage and preserve your home’s interior.

Mold growth is another critical indicator. Mold thrives in moist environments, and its presence suggests prolonged water intrusion. This could be due to moss growth on your roof in Jacksonville, which retains moisture and promotes mold proliferation. Algae growth on your roof in Jacksonville can also contribute to this problem, signaling potential shingle damage that allows water to seep inside.

Inspect your attic for any signs of daylight peeking through the roof boards during your interior checks. This clearly indicates that your roofing material has been compromised and may need immediate repair or replacement.


FAQS

K
L
1. Can I Install Metal Roofing Over Existing Shingles?

Yes, you can install metal roofing over shingles if the shingles are in good condition and local building codes allow it. This saves time and labor costs, but it's essential to ensure the roof decking is solid to support the metal panels.

K
L
2. How Long Does a Metal Roof Last?

Metal roofs are known for their exceptional durability, often lasting between 40 to 70 years. Proper installation and regular maintenance ensure your metal roof provides long-term protection against harsh weather conditions.

K
L
3. What Type of Underlayment Should I Use for Metal Roofing?

For metal roofing, synthetic underlayment is the best choice due to its moisture resistance and durability. It provides an extra layer of protection, helping to prevent leaks and prolong the life of your roof.

K
L
4. Do I Need Special Tools to Install Metal Roofing?

Yes, installing metal roofing requires specific tools like tin snips, metal roofing screws, a power drill, and safety equipment such as a harness. These tools ensure the metal panels are cut, aligned, and secured properly for a water-tight, durable roof.

Final Words

Installing a metal roof can be a rewarding project that offers lasting benefits like durability, energy efficiency, and a modern aesthetic. By following this 7-step guide, you can ensure a smooth, effective installation whether you’re working on a house, shed, or commercial property. However, if you’re unsure about tackling the project yourself or want professional results, it’s always a good idea to consult an expert. Steel Rudder Roofing is here to help with top-quality metal roofing services, providing long-term protection and peace of mind. Contact us today to ensure your roof is installed perfectly and built to last!

How long do you want to deal with roofing problems?

Contact us for a free consultation and start your journey to a new, worry-free roof with Steel Rudder Roofing!

Get in Touch

(904) 699-4573
kenbaker@steelrudder.com

Hours of Operation

Monday – Friday: 8am – 6pm
Saturday – Sunday: 9am – 1pm

Our Headquarters

10151 Deerwood Park Blvd.
Building 200, Suite 250

Jacksonville, FL 32256

Contact Us Today